
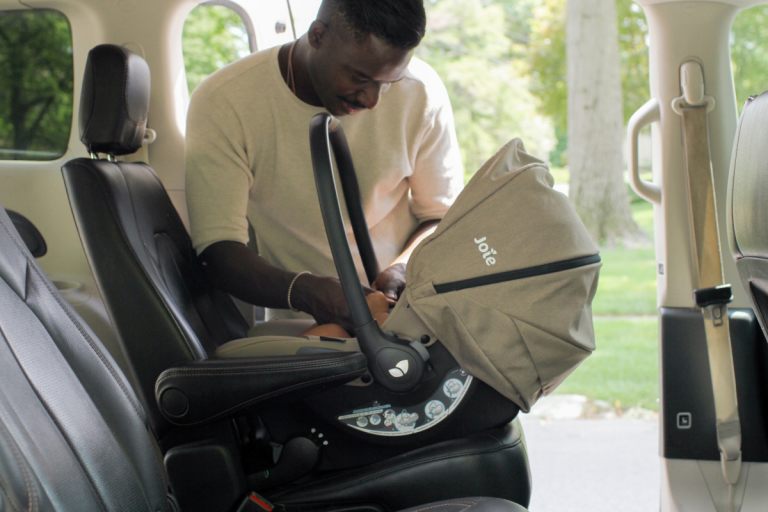
The 5 Most Common Car Seat Installation Mistakes—and How to Fix Them
Learn how to spot and prevent these frequent errors.

By
If you’re intimidated by installing a car seat, you’re not alone. As a Child Passenger Safety Technician (CPST), I’m trained to educate parents and caregivers about car seat usage and safety. I’ve been testing and writing about car seats as Babylist’s gear editor for over five years, and have two young kids of my own—and I still pore over the car seat manual, talk with other CPSTs and learn something new each time I install a seat.
While nothing replaces reading your manual and following specific installation instructions, understanding common installation mistakes can be incredibly valuable. I combined my expertise as a CPST with insights from Kathleen Clary-Cooke—a CPST instructor with over a decade of experience—to highlight the five most frequent car seat installation mistakes and provide practical solutions to fix them.
1. Not Reading the Manual
Does reading your car seat’s manual sound like a long, boring high school homework assignment? Sort of. But, unlike many things you had to do in high school, is it really important? 📣 YES!
“When I get a call from expectant parents who want help installing their car seat, their first assignment is to take the car seat out of the box and their second assignment is to read the manual,” says Clary-Cooke. “Many times, we only have to tweak a couple of things because they took time to read the manual.”
Reading the car seat manual is crucial. (Even for CPSTs!) It contains all sorts of critical information, including things like:
An overview of the car seat’s features
The height and weight minimums and maximums for your car seat
Different types of installation methods (LATCH, seat belt, etc.) and step-by-step installation instructions—and how to check your work
General use information, like how to secure your child in the seat
Care and maintenance instructions
Every car seat is different, and what’s permitted for one seat may be the opposite for another. Read your manual cover to cover.
And while you’re head down, there’s one more manual you’ll have to check: your vehicle owner’s manual.
“It’s also important to check the vehicle owner’s manual because the vehicle may have rules about how and where child restraints can be installed,” urges Clary-Cooke.
Vehicle manuals are thick and daunting, and knowing how to navigate your manual can help. Car seat information is most often in a specific section labeled “child restraints” or “child restraint systems.”
💡CPST Pro Tip: Worried about misplacing your car seat manual? Many car seats have a built-in slot or pocket specifically for manual storage. If yours does, use it; that way, you’ll always know where to look. Otherwise, stash your manual somewhere that’s memorable and easy to access. And if you ever misplace your hard copy, they’re all available online on car seat manufacturers’ websites.
Here are links to car seat manuals for some seats that are popular among Babylist parents:
Car Seat Manuals for Popular Car Seats
2. Loose Installation
A car seat that’s too loose can’t do its job of protecting your child in the event of a crash. Many parents struggle with just how tight their car seat should be—and how to check if it’s tight enough.
When installed correctly, a car seat should not move more than one inch side-to-side or front-to-back. You can test this by using moderate force at the seat’s belt path to move the car seat from left to right and front to back.
Check for movement at the belt path only. The car seat should move less than one inch in any direction. (Photo: Jen LaBracio, Babylist Senior Gear Editor)
💡CPST Pro Tip: One of the most common mistakes parents make when checking the tightness of their car seat is testing it in places other than the belt path, like the top of the seat or near the footrest area. If you pull back and forth on a car seat at the top, for example, it will likely move much more than an inch, giving you the (incorrect) impression that the seat isn’t tight enough. Don’t do this! Test for movement at the belt path only.
3. LATCH Errors
🤓🚙 LATCH 101! An acronym for Lower Anchors and Tethers for CHildren, LATCH is an attachment system that was created to simplify car seat installation. A vehicle’s LATCH system is made up of two lower anchors and one tether anchor. You’ll find at least two complete LATCH systems (and one additional tether anchor) in most vehicles made after September 2002.
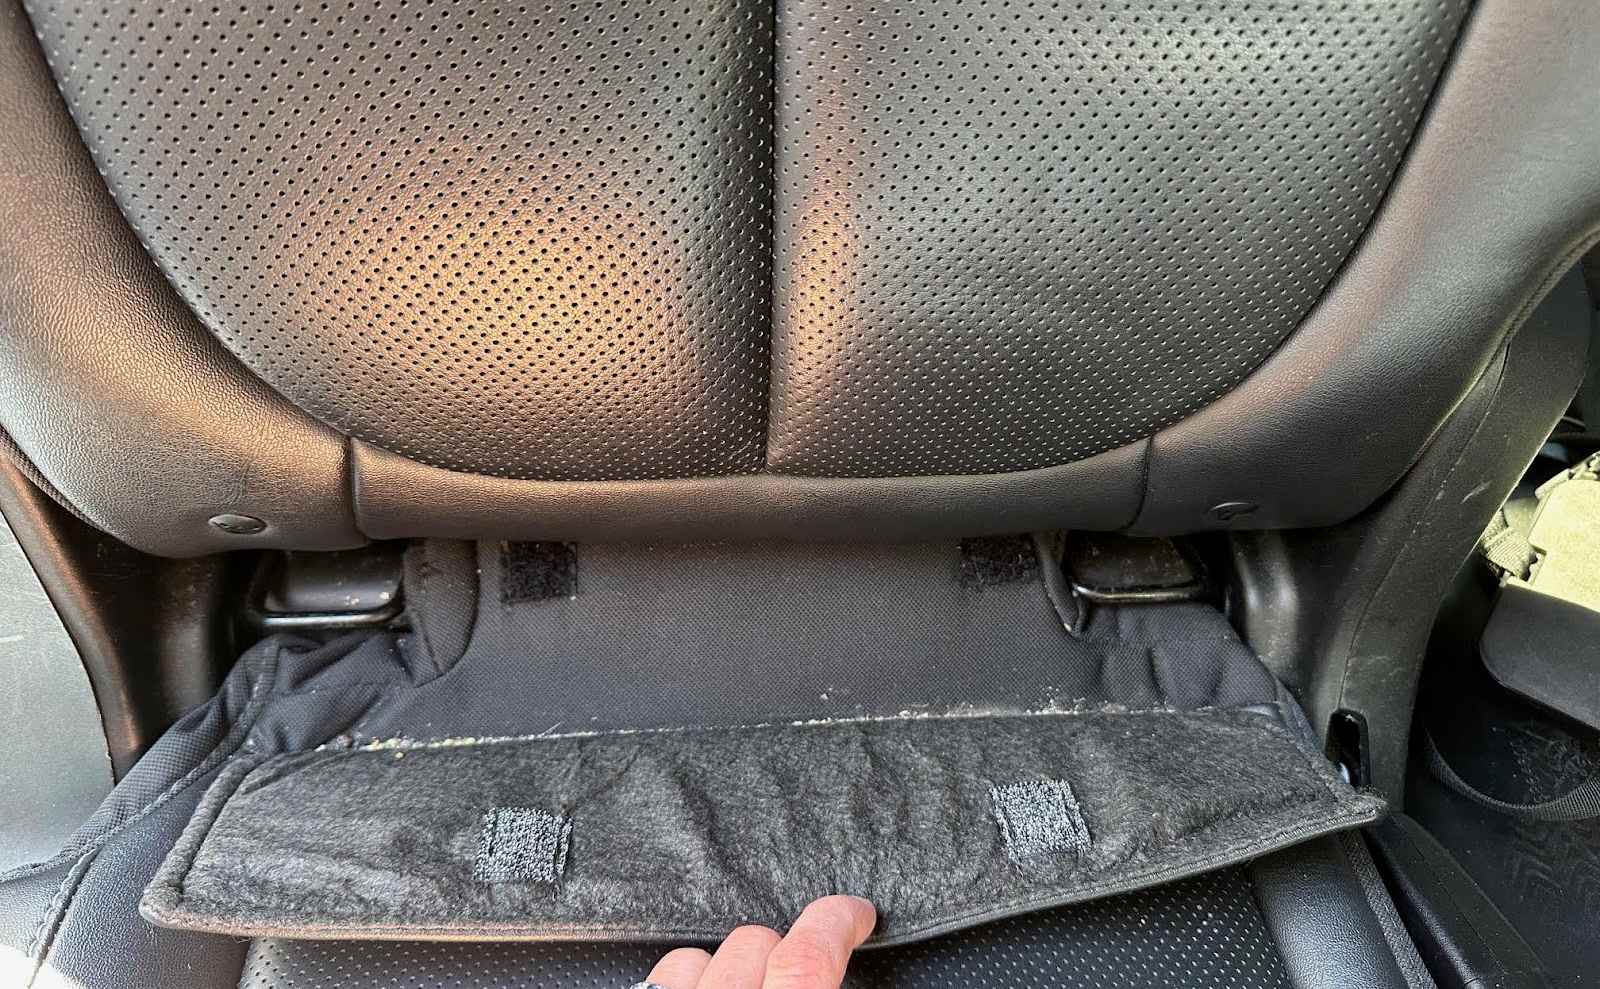
Two lower anchors in the second row of a 2021 Jeep Grand Cherokee L. (Photo: Jen LaBracio, Babylist Senior Gear Editor)
There are a couple of common LATCH errors parents often make when installing a car seat. The most common is using both LATCH and the vehicle seat belt to install a car seat, thinking that’s the safer, more secure option. But it’s actually unsafe in most car seats—in almost all instances, you can use one or the other, not both.
“It seems like it would make sense that if one is good, two are better. However, there are only a couple of car seats on the market in the US that allow it,” emphasizes Clary-Cooke. “[In most cases], we use one or the other, but not both.”
The second LATCH mistake happens when parents or caregivers try to install a rear-facing only seat (an infant car seat) in the center seating position but use the wrong lower anchors, called “LATCH borrowing.”
Many vehicles don’t have dedicated lower anchors in the center seating position. To circumvent this, folks sometimes try to “borrow” the anchors from the outbound passenger and driver’s side seats, using one lower anchor from each side to install the seat. But not all vehicles—and not all car seats—allow this.
“It’s important to check both [the car seat and the vehicle] manuals. If one says it’s not allowed, then the other can’t override it,” says Clary-Cooke.
The good news is that even if your vehicle doesn’t have lower anchors in the center seating position, you can still safely install your car seat using the seat belt as long as it fits well.
💡CPST Pro Tip: At the time of this writing, the only car seats currently sold in the US that allow both LATCH and seat belt installation together are the Nuna Pipa series, the Clek Foonf (forward-facing only) and babyark.
4. Not Using the Top Tether
Once you turn your child from rear- to forward-facing, you’ll need to secure your car seat using the top tether in addition to LATCH or the vehicle seat belt. “The top tether is very important because it limits the forward movement of the child’s head in a collision,” says Clary-Cooke.
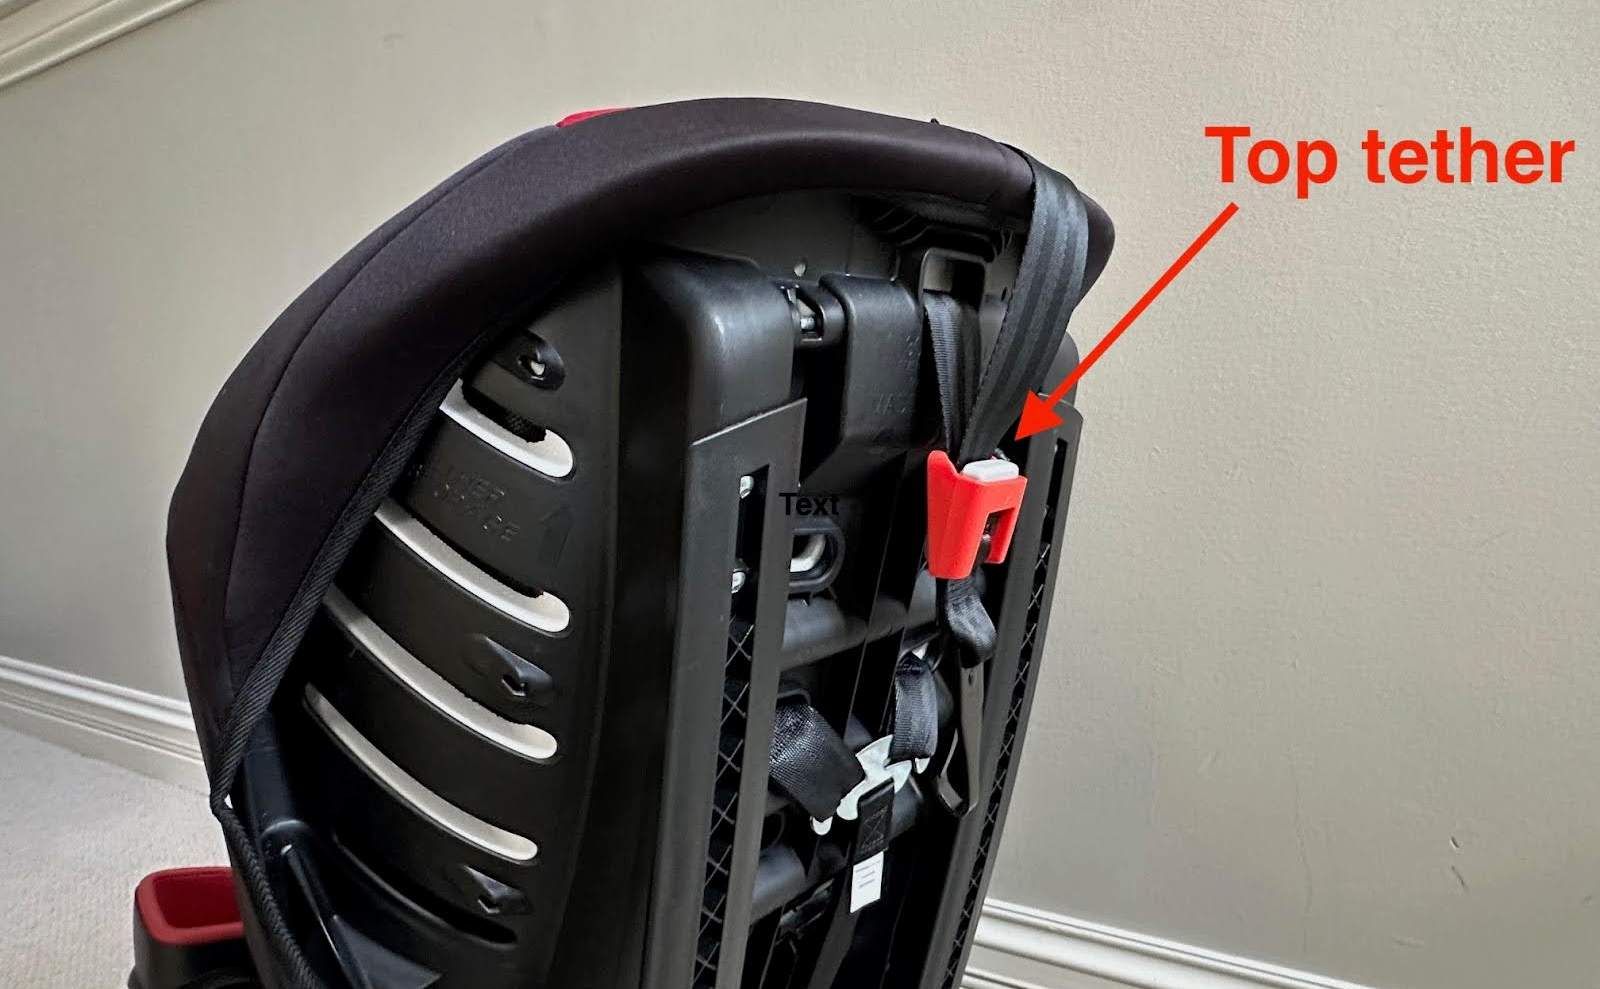
The top tether on the rear of an Evenflo Sonus 65 Convertible Car Seat. (Photo: Jen LaBracio, Babylist Senior Gear Editor)
But many parents forget this important step during installation—about half, according to Clary-Cooke. Always be sure to consult your car seat manual to learn how to connect and tighten your car seat’s top tether during installation. And take a peek at your vehicle owner’s manual, too; top tether anchors aren’t always marked, and your manual will help you to correctly identify them in your car.
💡CPST Pro Tip: Some rotating car seats allow or require the use of a top tether when rear-facing, so always check your car seat manual.
5. Graduating Too Soon
While this one isn’t technically an installation error, it’s a common car seat mistake that all parents and caregivers should know about.
Car seats are complicated. It takes time to install them, use them correctly and get your child in and out over (and over, and over) again. It can be tempting to rush through the different stages—infant seat to convertible and ultimately a booster seat—in an effort to simplify your life. But it can create an unsafe situation for your child while riding in the car.
The safest option is to keep your child in the correct car seat for their age, weight, height and developmental level until they max out the seat's limits before moving up.
“Some parents are tempted to turn kids forward-facing too soon,” explains Clary-Cooke. “We know that kids are safest rear-facing and we encourage them to keep their kids rear-facing as long as possible, but at least until age two.”
Don’t rush to a booster seat, either. Booster seats allow for much more freedom of movement than a harnessed car seat—and most kids aren’t ready for one until at least five or six years old.
“Once a child is in a booster, they are in charge of their own safety. Not only do they need to meet the height and weight minimums for the seat, but they have to be able to sit up straight and wear the seat belt correctly.”
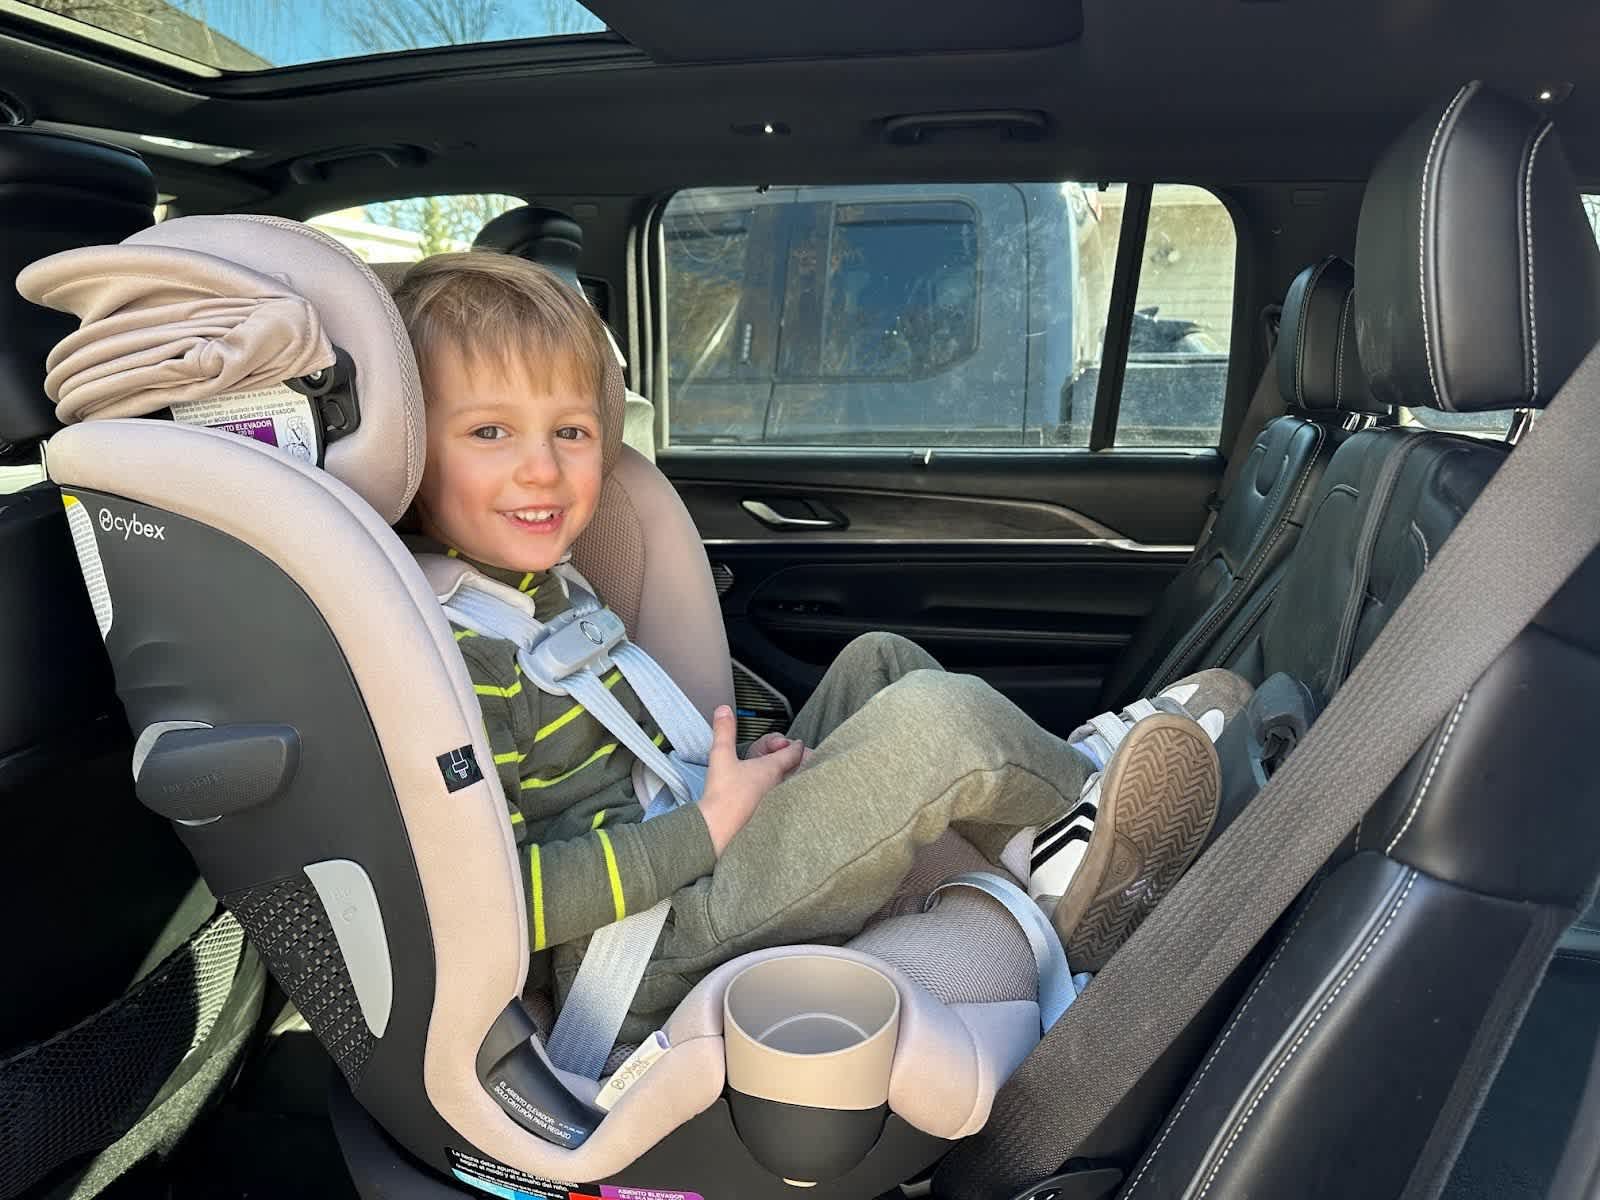
Our model Ben is just over 3.5 years old, 41” tall and 31 lbs. He’s still comfortably rear-facing in the Cybex Callisto G 360° Rotating All-in-One Convertible Car Seat. This car seat has a rear-facing limit of 40 pounds or 43.3”, so it’s likely he’ll outgrow the seat by height long before he outgrows it by weight. (Photo: Jen LaBracio, Babylist Senior Gear Editor)
Expert Sources
Babylist content uses high-quality subject matter experts to provide accurate and reliable information to our users. Sources for this story include:
Kathleen Clary-Cooke, a CPST since 2014 and a CPST-I (instructor) since 2017. Kathleen served as the Coordinator for Safe Kids Benton-Franklin in Eastern Washington State from 2013-2021. She currently teaches CPST certification classes in Wyoming and Colorado and volunteers with Safe Kids Laramie County in Cheyenne, WY. She has three adult children and three (perfect) grandchildren.